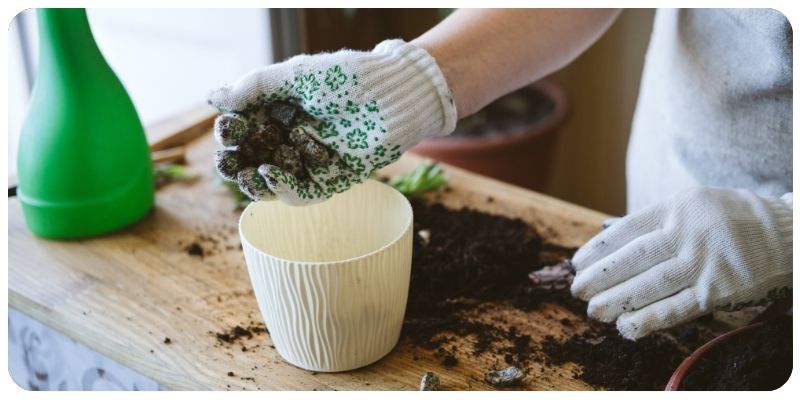
How to Repot Your Houseplants: A Step-by-Step Guide
Repotting is a crucial aspect of houseplant care. Over time, plants outgrow their pots, and repotting allows them to continue thriving by giving their roots more space, fresh soil, and access to new nutrients. This guide will walk you through the repotting process step by step to ensure your plants remain healthy and vibrant.
1. Why and When to Repot Your Houseplants
Repotting is important for several reasons, but how do you know when it's time to repot? Here are some key indicators:
Signs Your Plant Needs Repotting
- Root Bound: If you notice roots growing out of the drainage holes or circling the pot, the plant is root-bound and needs more space.
- Slow Growth: If your plant's growth has slowed despite proper care, it could indicate that the plant has outgrown its current pot.
- Depleted Soil: Over time, the nutrients in potting soil are used up, leaving the soil compacted and less nutrient-rich. Repotting replenishes the nutrients your plant needs.
- Water Drains Too Quickly: If water runs through the pot too fast, it may be time to repot and add fresh, moisture-retaining soil.
2. Choosing the Right Pot and Soil
Before repotting, you'll need to choose the right pot and soil for your plant. Selecting a pot that is slightly larger than the current one gives the roots room to grow without overwhelming the plant. You'll also need a high-quality potting mix suitable for the specific type of plant you're repotting.
Pot Selection Tips
- Size: Choose a pot that is 1-2 inches larger in diameter than the current pot. Avoid going too big, as excess soil can hold water and lead to root rot.
- Material: Clay, terracotta, and plastic pots are all suitable. Terracotta is porous and allows for good airflow, while plastic retains moisture longer.
- Drainage: Ensure your pot has drainage holes to prevent water from sitting at the bottom and causing root rot.
Choosing the Right Potting Soil
- Plant-Specific Mix: Some plants, like succulents and cacti, require fast-draining soil, while tropical plants prefer a more moisture-retentive mix. Choose soil according to your plant’s needs.
- High-Quality Potting Mix: Avoid using garden soil for houseplants, as it can be too dense and may contain pests or pathogens. Opt for a sterile, high-quality potting mix.
3. Preparing for Repotting
Before you start repotting, gather all necessary materials, including your new pot, fresh potting soil, gloves, and a trowel. It's also a good idea to water your plant a day before repotting to make the process easier on the roots.
What You’ll Need
- A new pot with drainage holes
- Fresh potting soil
- Watering can or spray bottle
- Gloves (optional)
- Trowel or small shovel
4. Step-by-Step Repotting Process
Follow these steps to successfully repot your houseplant:
Step 1: Remove the Plant from Its Current Pot
Gently remove the plant from its pot by tipping the pot on its side and lightly squeezing the sides or tapping the bottom to loosen the root ball. Avoid pulling the plant by the stem, as this can cause damage.
Step 2: Loosen the Roots
Once the plant is out of its pot, inspect the roots. If they’re circling the bottom of the pot, gently tease them apart to encourage growth. If the roots are very dense or compacted, use clean pruning shears to trim them slightly.
Step 3: Add Fresh Soil to the New Pot
Add a layer of fresh potting soil to the bottom of the new pot. This gives the roots space to grow. Place the plant in the new pot, ensuring that it sits at the same depth as it did in the old pot.
Step 4: Fill in with Soil
Once the plant is in place, fill in around the root ball with fresh potting soil. Gently press the soil down to eliminate air pockets, but avoid packing it too tightly. Leave about an inch of space at the top to make watering easier.
Step 5: Water Thoroughly
After repotting, water the plant thoroughly to help settle the soil and reduce transplant shock. Make sure the water drains out of the bottom of the pot. If needed, top up the soil after watering.
5. Aftercare Tips
After repotting, your plant may experience a brief period of stress. To help your plant adjust to its new pot, follow these care tips:
- Avoid Direct Sunlight: Keep your plant out of direct sunlight for the first few days after repotting to reduce stress.
- Water as Needed: Monitor the soil moisture closely, but avoid overwatering. Only water when the top inch of soil feels dry.
- Watch for Signs of Stress: If you notice yellowing leaves or drooping, adjust your watering schedule and ensure the plant is in a suitable location.
Conclusion
Repotting is a vital part of houseplant care that gives your plants room to grow and access to fresh nutrients. By following this step-by-step guide, you’ll ensure a successful repotting process that promotes healthy root development and overall plant growth. Keep an eye on your newly repotted plant, provide proper aftercare, and enjoy the benefits of a thriving indoor garden.